
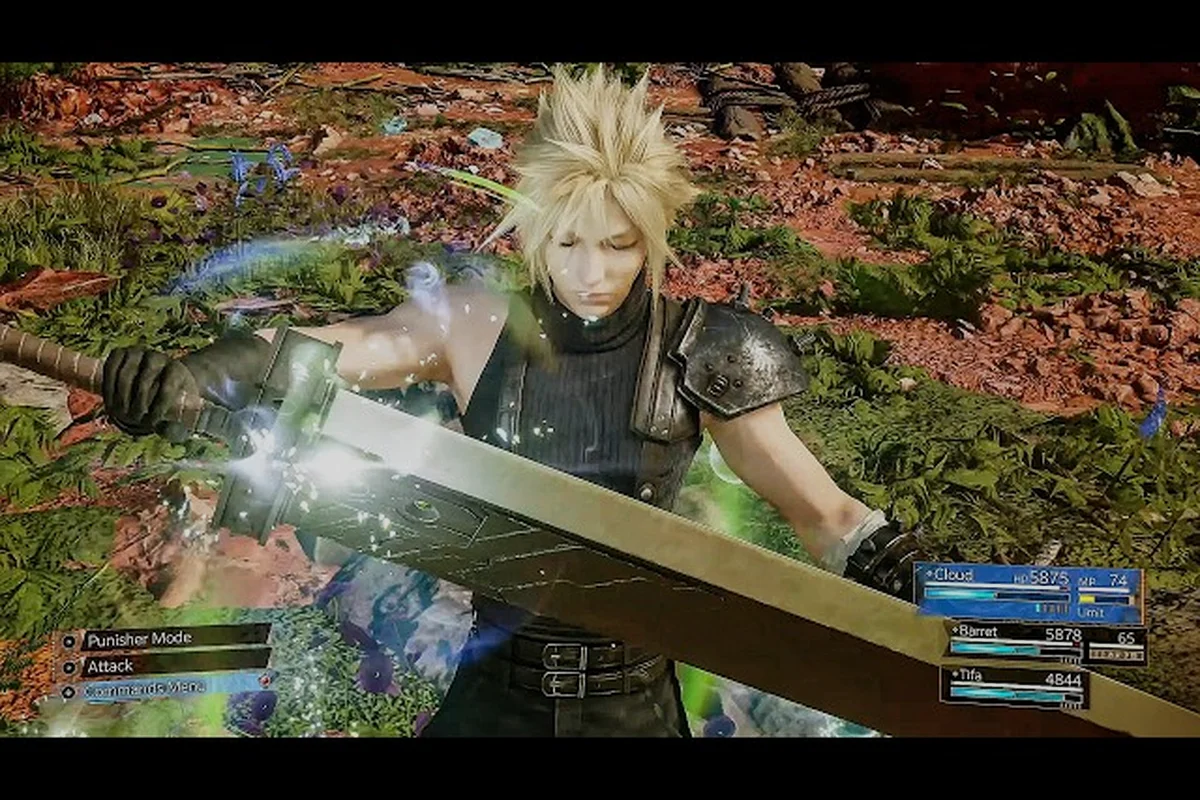
FINAL FANTASY VII REVELATION closes the FFVII remake trilogy with the densest combat system Square Enix has shipped for the franchise, blending real-time sword swings with a slowed Tactical Mode that lets you queue abilities from the command menu. This ff7 revelation combat tips guide focuses on the layer most new arrivals skip: how to read enemies, build pressure, and turn your ATB gauge into a tempo engine. By the end you will understand the rhythm that turns a chaotic Sephiroth encounter into a controlled execution, and you will know which pieces of the broader class system actually matter for the late game.
The Combat Triangle: Real-Time Attacks, Tactical Mode, and ATB Tempo
Every fight in FINAL FANTASY VII REVELATION flows through three layers that you toggle between mid-swing. Real-time attacks are your bread-and-butter sword strikes, gunfire, and dodges — they fill the ATB gauge at a rate determined by your weapon and equipped materia. The moment you have at least one ATB charge, you can press the tactical trigger to enter Tactical Mode, where the world slows dramatically and the command menu opens for spellcasting, ability use, and item consumption. The third layer, the Synergy Bar, fills passively and unlocks cinematic duo attacks once you and a teammate both contribute to it.
The system rewards players who treat ATB as a metronome rather than a panic button. According to the official Steam store description, real-time attacks are explicitly described as the way to build the gauge while Tactical Mode is where you spend it — that distinction is the single most important lesson the opening hours teach. Newcomers tend to hoard charges and dump everything in a single window, which collapses their tempo and leaves them vulnerable during the long animation.
Phase Windows and the Pressure Cycle
Most boss fights in the late game follow a three-phase cycle: opener, enrage, and desperation. The opener phase usually lasts 30 to 45 seconds and gives you free reign to build ATB. The enrage phase triggers around 60% HP and introduces new attack patterns, while the desperation phase at 25% HP and below frequently adds arena hazards or summons adds. The pressure cycle is identical for almost every major encounter, which means once you learn to read one boss you can apply the same timing to the next.
| Phase | HP Threshold | Typical Duration | Your Goal |
|---|---|---|---|
| Opener | 100% to 60% | 30 to 45 seconds | Build ATB, apply debuffs, test patterns |
| Enrage | 60% to 25% | 45 to 75 seconds | Punish openings, manage adds, conserve resources |
| Desperation | Below 25% | Variable | Burst with Limit Breaks, survive scripted kills |
The danger most players run into is over-committing during the opener. Because the boss telegraphs widely and rarely one-shots in this phase, it is tempting to spam your hardest abilities. Experienced players instead use the opener to map out the boss's attack string, learn the recovery frames, and only commit hard when they recognize a punishable window. The result is a slower, more deliberate opener that pays off massively when the desperation phase arrives.
FF7 Revelation Combat Combos: Building a String Engine
The combo system in this entry is more forgiving than REBIRTH's strict string timing, but it still rewards precise input. Each weapon has a three-hit base string, and chaining strings together while your enemy remains stunned extends the combo counter and inflates stagger damage. The trick is that a single Tactical Mode pause does not break the combo, but entering and exiting Tactical Mode counts as a soft reset, and the stagger meter decays the moment you stop applying pressure for more than two seconds.
For most encounters the ideal combo route is basic string into ATB ability into re-engage. Cloud's Cross-Slash is the canonical example: land a three-hit string, dodge through the boss's counter, drop into Tactical Mode to fire Cross-Slash plus a spell, then exit Tactical Mode and resume the string while the boss is still in hitstun. This cycle adds roughly 2.5x the damage of a passive string-and-run approach, and it scales further when you factor in synergy attacks.
The Punish Window
Every enemy in the game has a stagger state that lasts between four and eight seconds depending on the foe. During stagger the enemy takes 1.6x damage and cannot act, which makes stagger windows the only reliable burst opportunity. The punish window is short, which is why the most common mistake newcomers make is wasting stagger on their highest-cooldown ability rather than on a tightly sequenced burst.
| Stagger Source | Stagger Duration | Best Follow-Up |
|---|---|---|
| Sword string into ATB | 4 to 5 seconds | Cross-Slash + Thunder |
| Synergy activation | 6 seconds | Limit Break if bar is ready |
| Summon ultimate | 8 seconds | Elemental spam + Cure |
| Vulnerability proc | 5 to 7 seconds | Ranged cleanup |
Notice that the Summon ultimate entry produces the longest stagger window of any mechanic, which is why summon timing is the single most important decision in long boss fights. If you can land a summon at the start of the enrage phase, the eight-second window lets you unload your full cooldowns and skip directly into the desperation phase with a clean resource slate.
Aerial Combat: How to Stay Airborne Without Punishing Yourself
FF7 Revelation aerial combat is more nuanced than in earlier trilogy entries. You can launch smaller enemies with upward sword swings, certain abilities, and environmental hazards, and once airborne the enemy takes 1.3x damage but cannot be hit by most ground-based attacks. The catch is that aerial juggling requires your character to commit a specific ability — for Cloud this is Aerial Fang, for Tifa it is Whirlwind Kick, and for Yuffie it is built into her base kit. Without that specific ability the enemy falls back to the ground immediately and you lose the juggling chain.
The key decision is whether to chase aerial damage or stay grounded. Generally, aerial juggling is worth it when the enemy has low poise and cannot break out of the juggle within two seconds, and it is wasted on heavy bosses who will simply fall out of the air. Lightweight enemies like Shinra troopers, tonberry variants, and most mid-game adds all qualify for juggling. Bosses and elite adds generally do not.
Aerial Combo Routes Per Character
| Character | Launcher | Aerial Extension | Finisher |
|---|---|---|---|
| Cloud | Cross-Slash on launch | Aerial Fang x2 | Finishing Touch |
| Tifa | Whirlwind Kick | Rising Dragon | Starshower |
| Yuffie | Shuriken storm | Stormstorm | Moogle Throwing |
| Aerith | Tempest Rod arc | Magic burst | Healing Wind |
| Barret | Overrun leap | Big Shot | Catastrophe |
Yuffie stands out as the most efficient aerial juggler because her shuriken storm keeps enemies suspended without spending ATB, which means she can maintain aerial pressure while her teammates build resources on the ground. Aerith is the inverse: her aerial contribution comes almost entirely from magic rather than physical juggling, which means she spends ATB to stay in the air but the payoff is high stagger damage from a fully charged spell.
Ranged Combat: Pressure, Repositioning, and Kite Windows
Ranged combat in FF7 Revelation often goes underused because the melee tools feel so powerful, but ranged pressure is the cleanest answer to a number of common problems. The first is kiting. When a boss refuses to enter a punishable window, you can hold a mid-ranged position and apply steady ranged pressure to keep the stagger meter from decaying. The second is repositioning — ranged attacks are the fastest way to escape a telegraphed arena hazard without burning your dodge charges.
The main ranged weapons each behave differently. Cloud's Hardedge gives up close-range combo damage for a mid-range poke with built-in stagger bonus, while Yuffie's Shooting Star is effectively a full auto-rifle that can shred adds from across the arena. Barret's Big Bertha doubles as both ranged pressure and an anti-air option, which is why he remains the safest member of the party in mixed-elevation fights.
Ranged Pressure and the Kite Triangle
The kite triangle is a community-coined term for the three positions you cycle through when pressured. The close-mid position lets you keep melee combos alive while still being able to dodge back to safety. The mid-far position is your ranged pressure zone, where you apply damage without committing to a melee string. The far-back position is reserved for scripted arena hazards and Limit Break charge phases.
| Position | Use Case | Risk Level |
|---|---|---|
| Close-mid | Melee combo with dodge | High but rewarding |
| Mid-far | Ranged pressure | Medium, flexible |
| Far-back | Hazard dodge, Limit charge | Low damage, safe |
Skilled players rotate through these three positions every ten to fifteen seconds rather than camping in one. The result is that the boss is constantly re-evaluating targets, which buys the team a small but reliable stagger advantage. The mistake most intermediate players make is camping at close-mid the entire fight, which is the position that gives the boss the most opportunity to land an unpunished heavy attack.
Magic Combat and Synergy: Turning Spells into Stagger Tools
Magic in FF7 Revelation is more than just damage — it is the most reliable way to build stagger on resistant enemies, and certain elemental pairings can break bosses that resist physical damage entirely. The magic combat layer runs through the same ATB economy as physical abilities, which means a spell-heavy rotation costs the same tempo budget as a melee rotation. The advantage is that spells are not subject to many boss armor passives, which makes them the universal fallback.
The core pairing rule is straightforward: if a boss is weak to an element, stack that element in your active party. If the boss is resistant, swap to a spell that applies a status effect instead. According to community testing reports on the Steam discussions board, players who swap their magic loadout to match the encounter rather than running a fixed build report noticeably shorter kill times on bosses after the first chapter.
Synergy Bar Management
The Synergy Bar is shared between you and your currently active ally, and it fills faster when you perform complementary actions in a short window. The fastest way to fill the bar is to land a magic hit and have your partner follow with a physical strike, or vice versa. Once full, the bar triggers a cinematic Synergy attack that staggers most enemies and deals heavy damage.
| Synergy Source | Fill Speed | Payoff |
|---|---|---|
| Magic into physical | Fast | Burst stagger |
| Physical into magic | Fast | Burst stagger |
| Same element twice | Slow | Minimal fill |
| Healing during partner attack | Moderate | Utility synergy |
The most common synergy mistake is firing two magic abilities back to back, which both drains ATB and fills the bar at the slower rate. Pairing your spell with a sword strike is almost always the correct choice unless you are trying to land a quick elemental proc before the boss shifts resistance. The cross-link between magic timing and stagger is why the materia leveling guide is worth pairing with this article — better linked slots mean more reliable elemental coverage, which means more reliable stagger opportunities.
Enemy Reads and Pressure Chains: The Layer Most Players Skip
The single biggest differentiator between intermediate and advanced players in this game is reading enemy telegraphs. Every enemy, including bosses, has a fixed attack pattern that follows a three-swing rule: the first two attacks are predictable, and the third attack is the punish window. This is most visible in humanoid enemies, where the first two swings are committed attacks and the recovery on the third swing always opens the same way.
Reading the pattern is not the same as memorising it. Reading means watching the boss's weight shift, shoulder position, and weapon arc to identify the recovery frame in real time. Memorising means grinding the same boss ten times until you can recite its script. Reading is the higher-skill ceiling and the reason why the same player who beats one boss in four minutes can also beat a brand-new boss in two minutes on the first attempt.
Pressure Chain Construction
A pressure chain is the sequence of actions you perform from the moment a boss becomes vulnerable until it re-enters its attack cycle. The most efficient chains look like this in practice:
-
String opener — Three-hit sword string to fill the first ATB
-
Tactical pause — Drop into Tactical Mode and fire your burst ability
-
Synergy confirm — If the Synergy Bar is full, trigger it here
-
Ranged follow-up — Swap to a ranged weapon if the boss is retreating
-
Reposition — Return to mid-far for the next cycle
The pressure chain concept ties together everything discussed above: combos, aerial work, ranged pressure, magic, and synergy all operate on the same ATB economy. The advanced player does not silo these systems. They treat them as a single tempo engine, and the engine produces reliable staggers regardless of the boss in front of them. Players who reach this layer quickly find that boss strategy guides become less necessary because the underlying read pattern is the same across the entire game.
Putting It All Together: A Clean Boss Execution
Imagine a standard late-game boss at full HP. The pressure cycle is two minutes long, the boss has three phases, and your team has a Limit Break available. The opening phase begins with a four-second string, an ATB ability, and a Synergy activation — about 18 seconds of tempo. The boss enters its enrage phase with a telegraphs that your reading identifies as a punish window, and you unload a full magic burst into the stagger before the boss can reset. The desperation phase opens with an arena hazard that you kite using the mid-far position, and the fight closes with a Summon ultimate into a Limit Break chain.
That single paragraph is what these ff7 revelation combat tips are really about — chaining systems together until the fight becomes a controlled execution rather than a reactive scramble. The advanced combat guide here does not promise a universal rotation, because the best rotation changes by party composition. What it does promise is that the principles of pressure cycling, punish windows, and tempo economy apply to every encounter in FINAL FANTASY VII REVELATION, from the first Shinra trooper ambush to the final showdown with Sephiroth.
Frequently Asked Questions
What is the single most important FF7 Revelation combat tip for intermediate players?
Stop hoarding ATB charges. The biggest difference between intermediate and advanced play is that advanced players spend ATB on a metronome, firing one ability every 6 to 8 seconds, while intermediate players bank three or four charges and dump them in a single window. The tempo approach produces more staggers because the boss is constantly reacting to pressure.
How do I unlock aerial juggling for every character?
Each character has a specific launcher ability rather than a universal aerial button. Cloud uses Aerial Fang, Tifa uses Whirlwind Kick, Yuffie uses Shuriken Storm, and Aerith relies on her Tempest Rod arc. These abilities unlock through the FITS class system rather than the main quest, which is why pairing this guide with the FITS class system breakdown speeds up the unlock process considerably.
Is magic or physical damage better for boss staggers in FF7 Revelation?
Both work, but the choice depends on the boss. Elemental weaknesses are the cleanest stagger source, so against a fire-weak boss, magic is overwhelmingly better. Against a non-elemental boss, physical combos are more ATB-efficient because you do not need to cast a spell every cycle. The most advanced approach is to keep both loadouts ready and swap based on the encounter.
What is the best ranged weapon for solo pressure in the late game?
Yuffie's Shooting Star is the strongest standalone ranged weapon because it can hit adds from across the arena without sacrificing her aerial juggle potential. For a non-Yuffie party, Cloud's Hardedge is the most balanced option, while Barret's Big Bertha is the best for mixed-elevation fights where you need anti-air coverage.
How does the Synergy Bar interact with the Limit Break system?
The Synergy Bar and Limit Break are independent resources, but they share the same activation window. A well-timed Synergy activation that triggers a Limit Break chain can produce roughly 60% of a boss's HP in stagger damage during the desperation phase. The most reliable way to fill both resources is to rotate between magic and physical attacks so the Synergy Bar fills on the fast track while your ATB gauges fuel your Limit Break generation.