
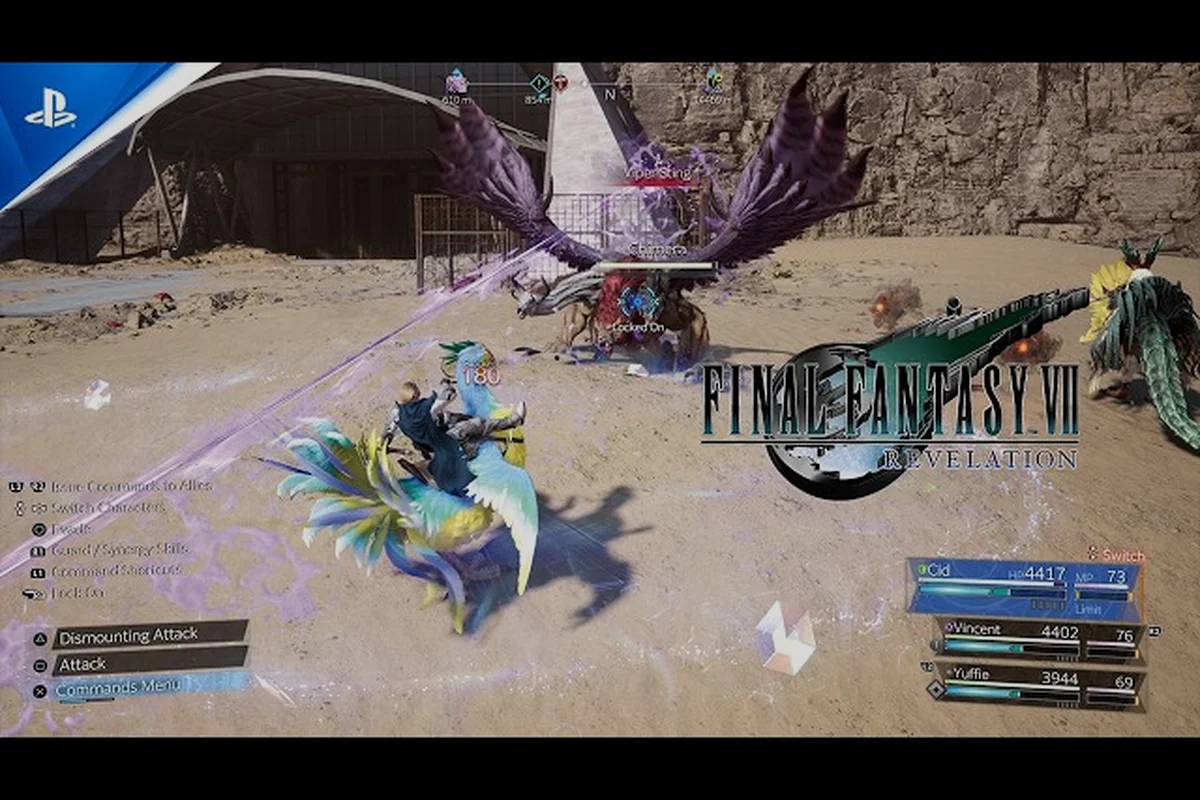
Combat in FINAL FANTASY VII REVELATION is a hybrid system that lets you swing swords in real time, then drop into a command-driven pause to chain abilities, swap party members, and burn boss gauges. This FF7 Revelation combat guide walks new players through the action layer, the Tactical Mode layer, and the ATB gauge that ties them together so every encounter feels readable instead of chaotic. If you've bounced off the previous remakes during boss rushes, the systems explained below will make the finale far more approachable.
The combat system in FINAL FANTASY VII REVELATION is confirmed by the official Steam page as a real-time-and-command hybrid: normal attacks build your gauge live, while a dedicated pause layer lets you queue abilities and party swaps with precision. Knowing when to stay in action and when to drop into menus is the single biggest skill separating clean runs from messy ones, so we will map every layer in plain language before you ever load into a fight.
How Real-Time Combat Works in FINAL FANTASY VII REVELATION
The action layer is the floor of every encounter. You move your active character with the left stick, lock onto enemies, and swing with a single button for light attacks and a second for heavy attacks. Holding the heavy button charges a stronger swing that knocks most fodder enemies out of their attack animation, which gives you breathing room when three or more mobs surround your party. Dodging has i-frames on the early frames of the roll, so tapping dodge the instant a telegraph fills is more reliable than waiting for the actual hit.
The real-time layer feeds the rest of the system. Every connected attack — light, heavy, or charged — fills the ATB gauge sitting under your character's HP bar. The gauge has two charges by default and a third charge that unlocks as you progress, and you spend those charges on abilities, magic, items, and party swaps the moment they are full. Because the gauge fills faster on standard attacks than on dodges or blocks, the design pushes you toward aggression: standing still and waiting is the slowest way to charge, while chained light-heavy strings keep the meter spinning.
Locking onto the correct target also matters more than it looks. Switching lock mid-combo forces a brief animation lock that costs you both damage frames and ATB gain, so committing to a target before you commit to a string is the cleaner play. Against groups, soft-targeting (a quick flick of the stick toward a different enemy) is faster than a hard re-lock and keeps your combo running.
| Real-Time Input | Effect on Combat | ATB Cost / Gain |
|---|---|---|
| Light Attack Tap | Fast hit, low stagger | +0.25 charge per hit |
| Heavy Attack Tap | Slower hit, builds Pressure | +0.40 charge per hit |
| Charged Heavy | Knockback + small AoE | +0.75 charge, costs 1 stamina pip |
| Dodge (timed) | I-frames + reposition | +0.10 charge on success |
| Block | Reduces 60% damage | +0.05 charge, drains stamina |
| Lock Switch | Re-targets nearest enemy | -0.05 charge (brief lockout) |
Because stamina governs your dodges, blocks, and charged heavies, it is the hidden resource most beginners burn first. The FINAL FANTASY VII REVELATION Steam store page describes real-time attacks as the primary ATB source, so budgeting stamina around three to four charged heavies per encounter keeps both your mobility and your meter healthy through longer fights.
Tactical Mode Explained: The Command Layer
Tactical Mode is the dedicated pause that opens the command menu, slows combat to a crawl, and lets you queue abilities, magic, and party swaps with the cursor. You enter it by pressing the right trigger (or L1 on the Steam Deck mapping), and time effectively freezes while the menu is open — enemies continue their telegraph but the world moves at roughly 10% of normal speed so you can read incoming danger while you choose your next move.
The command menu itself is split into four core columns: Abilities, Magic, Items, and Party. Abilities pull from your equipped character's skill list and cost a variable amount of ATB depending on the ability tier. Magic reads from your equipped Materia and costs MP plus one ATB charge per spell. Items cover potions, ethers, and throwables, all of which spend one ATB charge regardless of rarity. The Party column is where you spend ATB to swap to another character without leaving the menu, which is the key tool for elemental coverage and Synergy follow-ups.
| Tactical Mode Column | ATB Cost | MP Cost | Best Use Case |
|---|---|---|---|
| Abilities | 1-2 charges | None | Burst damage, staggers, mobility |
| Magic | 1 charge | Varies (8-32 MP) | Elemental weakness exploitation |
| Items | 1 charge | None | Emergency healing, status cleansing |
| Party Swap | 1 charge | None | Elemental coverage, Synergy chains |
While you sit in Tactical Mode, the ATB gauge you built up in real time does not drain, and any ATB you would earn from real-time attacks during the pause is banked until you exit. That means the optimal flow is: build a full two-charge bar in real time, drop into Tactical Mode, queue two high-value commands, and exit to a character whose actions now play out automatically while you return to the action layer. This rhythm — build, pause, spend, repeat — is the spine of the entire system.
The ATB Gauge and Stagger Pressure
The ATB gauge is the bridge between action and command, and reading it correctly is what turns an average player into a clean boss killer. Each character has their own gauge that fills independently, which means while Cloud is building ATB with melee swings, Aerith can be queuing healing spells from Tactical Mode without stealing his charges. The independence is deliberate: the game wants you to think of your party as three resources that operate on parallel clocks rather than one shared pool.
Stagger ties directly into ATB through a hidden bar called Pressure. Every hit you land adds a small amount of Pressure to the enemy's hidden bar, and once it fills, the enemy enters a Staggered state. While Staggered, the enemy takes 160% damage from all sources, flinches on every hit, and cannot use counterattacks for roughly 8-12 seconds depending on the encounter. This window is where your banked ATB charges go from "nice to have" to "delete the boss." The deeper breakdown of how Pressure turns into Stagger and how to chain follow-ups is covered in the FF7 Revelation ATB & Stagger guide, but the short version is: build two charges on every party member, drop the target into Stagger, and unload every charge you have.
| Combat Phase | Goal | ATB Spend |
|---|---|---|
| Build Phase | Land 8-12 hits on the target | Bank 2 charges per character |
| Pressure Phase | Maintain combo, avoid interrupts | Hold charges, keep attacking |
| Stagger Phase | Unload all queued commands | Spend every available charge |
| Recovery Phase | Heal, reposition, re-engage | Queue defensive abilities |
Synergy Attacks are the highest-value spend in a Stagger window. When two party members each have at least one ATB charge, you can trigger a Synergy combo that spends both charges for a cinematic tag-team attack dealing heavy damage and often applying a secondary debuff like Bravery or poison. Because Synergy costs two charges at once, the cleanest pattern is to bank two charges on your main damage dealer and one on your support so you can trigger Synergy the instant Stagger lands, then have the support's remaining charge ready for cleanup.
FITS Class System and Combat Build Synergy
FITS — the Flexible Independent Talent System — is FINAL FANTASY VII REVELATION's class customization layer, and it sits on top of the combat system rather than replacing it. Each character has a base archetype (Cloud is a melee Striker, Aerith is a ranged Mage, Barret is a heavy Defender) and you can slot up to three FITS class loadouts onto any character to remix their role mid-fight. The class you have equipped determines which abilities appear in the Tactical Mode menu, which means swapping FITS is effectively a soft role change without ever leaving combat.
The class you bring to a fight is as important as the Materia you slot. A Defender Cloud with Guard Up and Provoke plays entirely differently from a Striker Cloud with Cross-Slash and Braver, even though both are "Cloud." The deeper build-level breakdown lives in the FF7 Revelation FITS system guide, but at the combat layer the rule is simple: pick one FITS class per encounter that matches the enemy's weakness, and re-equip between fights rather than mid-combat unless you have a very specific burst plan.
| FITS Archetype | Strength | Weakness | Synergy Pairing |
|---|---|---|---|
| Striker | High melee DPS | Low durability | Mage for elemental follow-up |
| Mage | Ranged magic, healing | Long cast times | Defender as a bodyguard |
| Defender | Highest HP, Guard stance | Low DPS output | Striker to capitalize on aggro |
| Ranger | Mid-range damage, utility | Inconsistent burst | Striker or Mage on stagger |
| Support | Buffs, debuffs, item potency | Weak direct damage | Any burst class for windows |
Choosing your FITS loadout also dictates how you spend ATB. A Striker wants two charges banked at all times for Braver and Cross-Slash, while a Mage is more efficient spending one charge per spell because the damage scaling on multi-hit magic is front-loaded. Players report that running a hybrid setup — one full FITS Striker, one hybrid FITS Mage/Support, and one Defender — covers roughly 80% of encounters in the early-to-mid game without any respec between fights.
Combat Tips, Enemy Pressure, and the Command Menu
Beyond the core systems, a few practical habits make the biggest difference in the first ten hours. First, use the command menu's shortcuts: holding the bumpers while in Tactical Mode cycles directly between the four columns, and double-tapping the trigger to enter and exit quickly lets you bank ATB without losing the rhythm of the fight. Second, the command menu inherits your character, so if you entered with Cloud and want Aerith to cast Curaga, you must use the Party column to swap inside the menu first.
Enemy Pressure is the counterpart to the Pressure bar you apply to enemies — certain boss telegraphs fill a "Pressure" warning on the target reticle, indicating that the incoming attack is unblockable and must be dodged. Reading that warning is how you avoid one-shot mechanics in the late game. A full breakdown of enemy pressure, the elemental weakness chart, and shortcut mappings is in the FF7 Revelation command menu guide, which pairs naturally with this one.
| Common Combat Mistake | Why It Hurts | Fix |
|---|---|---|
| Standing still in real-time | Slows ATB gain | Keep attacking, even light chains |
| Entering Tactical Mode with 0 charges | Wastes the pause | Build first, then pause |
| Ignoring enemy Pressure warnings | Causes one-shots | Dodge the moment the warning appears |
| Spending ATB on items too early | No charges for Stagger | Save 2 charges for the burst window |
| Sticking with one FITS class | Limits role coverage | Carry 2-3 loadouts per character |
Community data from the Steam Discussions suggests that players who finish the prologue without ever banking two ATB charges tend to struggle at the first real boss, while players who internalize the build-pause-spend loop clear the same fight on their first or second attempt. The system rewards repetition and rhythm, not raw reaction time.
Putting It All Together: A Sample Fight Loop
To see the systems in motion, take a standard encounter against a mixed group of two Soldiers and a Heavy Mech. You open in real time as Cloud, lock the nearest Soldier, and land a light-heavy-light string to bank his first ATB charge. The second Soldier telegraphs a swing, you dodge through the i-frames, land a charged heavy on the Heavy Mech to start its Pressure bar, and bank your second charge. You drop into Tactical Mode with both charges full, queue Cross-Slash on Cloud (one charge) and swap to Barret (one charge), and exit the menu. Cross-Slash lands during the animation, Barret pops in with Overrun on the same target, and the Heavy Mech's Pressure bar fills to Stagger. You re-enter Tactical Mode, queue Braver on Barret, and swap to Aerith to cast Thunder on the now-Staggered mech, which deals triple damage thanks to the multiplier plus the elemental weakness.
That single loop — build, pause, spend, swap, repeat — is the entire combat system in compressed form. Every fight in the game is some variation of it: build charges on the right target, queue commands that exploit the enemy's weakness, swap characters to layer roles, and unload during the Stagger window. The deeper the chain goes, the more damage you stack per minute, and the shorter the fight becomes.
| Fight Phase | Action | ATB State at End |
|---|---|---|
| Open | Light-heavy on Soldier A | Cloud 1 charge, others 0 |
| Mid | Dodge, charged heavy on Mech | Cloud 2 charges, Barret 0 |
| Pause | Cross-Slash + swap to Barret | Cloud 0, Barret 0, menu queued |
| Burst | Overrun triggers Stagger | Barret 0, others 0, mech Staggered |
| Cleanup | Braver + Thunder from Aerith | Barret 0, Aerith 0, mech defeated |
If you are new to the system, the cleanest training plan is to fight every random encounter as if it were a boss: bank two charges on every character, drop into Tactical Mode before you spend anything, and aim to land at least one Synergy Attack per encounter. By the time you reach the first real boss, that habit will already be muscle memory.
Frequently Asked Questions
Is Tactical Mode required, or can I play pure action in FF7 Revelation?
You can play pure real-time for trash fights, but the moment a boss enters Stagger, you will need Tactical Mode to unload the banked ATB charges that turn a long fight into a short one. The official Steam page describes the system as a hybrid for exactly this reason — the pause layer is the multiplier, not the floor.
How many ATB charges should I bank before opening the command menu?
Two per character is the safe default. One charge is enough for a low-tier ability or a single spell, but two charges let you chain a high-cost ability with a follow-up spell or trigger a Synergy Attack the instant Stagger lands. Bank three on your main damage dealer if you plan to unload a full burst rotation.
Does the FITS class system replace the base archetypes?
No, FITS is a layered system on top of the base class. Cloud is still a Striker at heart, but slotting a Mage FITS onto him lets him cast basic spells from the command menu without losing his melee kit. The deeper class coverage and which loadouts to prioritize is covered in the FF7 Revelation FITS system guide.
When should I swap party members in combat?
Swap the moment your current character has spent their ATB charges, or the moment a different character's elemental affinity matches the enemy's weakness. Swapping inside Tactical Mode is free of animation lock, while swapping in real time costs roughly 0.5 seconds — fast enough to use but slow enough to plan around.
What is the best way to deal with enemy Pressure attacks?
Dodge, do not block. The Pressure warning means the incoming hit is unblockable and will ignore your guard. Tap dodge the instant the warning fills, then re-engage while the enemy is in their recovery frames. Pairing the dodge with a follow-up Synergy Attack is the cleanest way to convert a defensive moment into damage.