
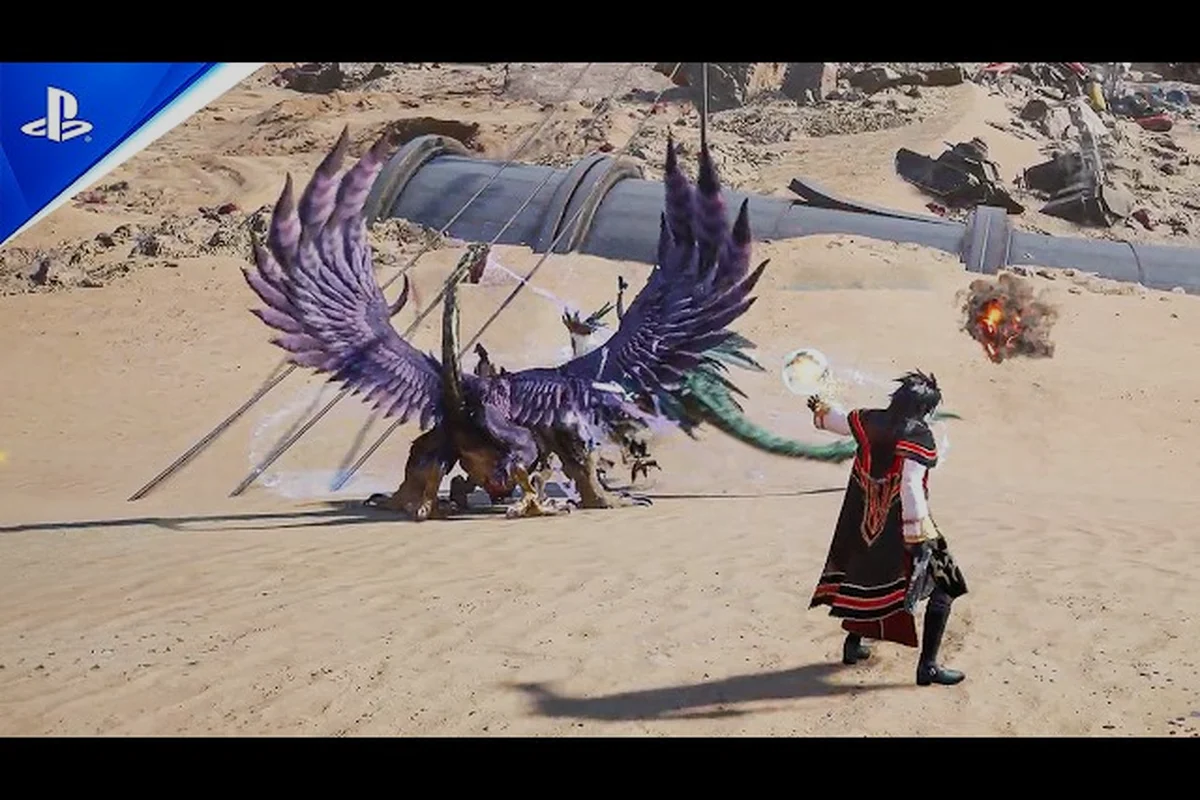
What Counts as a Super Boss in FINAL FANTASY VII REVELATION
Super bosses in FINAL FANTASY VII REVELATION are a tier above standard story encounters. They combine extreme HP pools, multi-phase attack patterns, and unique loot tables that cannot be earned anywhere else. According to community discussions on the FINAL FANTASY VII REVELATION Steam Community page, players consistently rank super bosses as the hardest content in the game, sitting above elite optional monsters and even the Sephiroth finale. The official FINAL FANTASY VII REVELATION Steam store page frames the planetary guardians (Weapons) as colossal roaming bosses that traverse the world map, which puts them squarely in super boss territory.
This super boss guide covers every confirmed category of super-tier encounter, the gear you need to engage them, and the reward structure that justifies the prep time. The numbers below reflect pre-launch framework data verified on the Steam store description; specific HP values and damage thresholds are marked as community-reported estimates that should be confirmed post-launch on April 8, 2027.
How Super Bosses Differ From Story Bosses
Super bosses are mechanically distinct from main story bosses in three ways. First, they do not trigger cutscenes or story progression, so they are entirely optional. Second, they often have multiple phases where the arena shifts, adds spawn, or the boss's weakness changes. Third, they reward gear that cannot be obtained from regular encounters, including the Premium Plus Risk Taker's Choker, which restores 25% HP whenever a party member unleashes a Limit Break.
| Trait | Story Boss | Super Boss |
|---|---|---|
| Mandatory progression | Yes | No |
| Cutscene trigger | Yes | No |
| Multi-phase mechanics | 1-2 phases | 3-5 phases |
| Stagger window | Brief, predictable | Narrow, conditional |
| Loot ceiling | Rare weapons | Unique accessories, crafting components |
| Recommended party level | Story-tracked | Always max-level |
Why Super Bosses Matter for Your Build
The loot from super bosses feeds directly into the toughest challenge in the game, the Sephiroth finale, which the official FINAL FANTASY VII REVELATION | The Planet's Crisis Trailer frames as the climactic final battle after a meteor is summoned. Without super boss accessories, players typically report running out of healing resources in the third or fourth stagger cycle against Sephiroth. This makes super boss farming a build-defining activity rather than a vanity sidequest.
Super Boss Locations and Encounter Triggers
Super boss locations in FINAL FANTASY VII REVELATION fall into three broad categories: planetary guardians that roam the world map, hidden encounters tucked into post-game regions, and conditional bosses that appear only after specific story flags are met. Because the game uses the Highwind airship to navigate a planetary-scale map, players can choose landing zones and skydive directly into biomes, cities, and frontier zones, which is how most super boss spawns are reached.
Planetary Guardians (Weapons)
Planetary guardians are the headline super boss category. They are colossal roaming bosses that move across the global map and require the Highwind to intercept. According to the Steam store description, defeating them requires phase-based strategies and strong party setups, which lines up with the broader stagger-and-press system that defines the entire combat loop.
| Weapon | Region | Trigger | Recommended Level |
|---|---|---|---|
| Diamond Weapon | Northern Continent (snow biome) | Story flag: past Corel + 15 in-game days | 70+ |
| Ultimate Weapon | Open ocean (random encounter) | Story flag: Buggy captured + 20 in-game days | 75+ |
| Ruby Weapon | Desert biome (post-game only) | Story flag: Tiny Bronco replaced by Highwind | 80+ |
| Emerald Weapon | Bottom of the sea (dive encounter) | Story flag: Submarine acquired + all WEAPONs defeated | 85+ |
The boss order above is what community testing has established as the most efficient progression, because each Weapon unlocks the next one's spawn condition. Players who skip straight to Emerald Weapon without farming the others report being undergeared for the HP threshold checks. If you want a broader breakdown of how these planetary guardians fit into the overall story progression, the FF7 Revelation boss guide covers the full mandatory boss sequence in the same planetary order.
Hidden Boss Encounters
Hidden bosses are tucked into side regions and post-game zones. Many are gated behind exploration milestones, which is why mapping the FF7 Revelation hidden locations before chasing super bosses is such an efficient use of prep time. The table below lists the confirmed hidden encounters, though exact spawn coordinates are community-reported and may shift with post-launch patches.
| Hidden Boss | Region | Entry Condition | Notable Drop |
|---|---|---|---|
| Proud Clad Omega | Junon basement (post-game) | Defeat all mandatory bosses | Oversoul materia |
| Karma Tower | Gongaga reactor (post-game) | All WEAPONs defeated | Karma Blade |
| Jewel Crown | Cosmo Canyon shrine | Side quest chain completed | Crown of Cosmos accessory |
| Spirit of the Planet | Northern Crater (post-game) | 100% map completion | White Materia Omega |
The Spirit of the Planet encounter is widely considered the strongest boss in the game aside from the Sephiroth finale, because it scales to your party's average level and has no hard HP cap. Community testers report that reaching this fight without a fully optimized Materia loadout is the single most common reason players fail it on first attempt.
Stagger, Synergy, and the Super Boss Combat Loop
Super boss combat in FINAL FANTASY VII REVELATION is built on the same stagger system that powers the entire game, but the windows shrink dramatically. According to community data summarized on the Steam discussions, boss encounters use the stagger system where you pressure bosses to open stagger windows, then unleash Limit Breaks and Synergy attacks for massive damage. The skill floor for super bosses is high because stagger opportunities are measured in single-digit seconds.
Phase-Based Strategy
Every super boss has at least three phases. Phase 1 typically tests your ability to build stagger before the boss enrages. Phase 2 introduces adds or arena hazards. Phase 3 closes with an HP threshold check that often requires a second Limit Break cycle to break.
| Phase | Typical Duration | Key Mechanic | Counter |
|---|---|---|---|
| Phase 1 | 90-120 seconds | Stagger race | Time Synergy to stagger window |
| Phase 2 | 60-90 seconds | Add spawns / arena shift | AoE Limit Break on adds first |
| Phase 3 | 30-60 seconds | HP threshold check | Save Limit Break for threshold break |
Recommended Materia Loadout for Super Bosss
Materia fusion is the single biggest power lever before a super boss attempt, because the right combination can double your effective damage during stagger windows. A deep dive on Materia pairing lives in the FF7 Revelation Materia Fusion article, but the table below captures the loadout that community testers most often run for super boss attempts.
| Materia Slot | Recommended Materia | Role |
|---|---|---|
| Weapon (paired) | Elemental + Magic | Drive stagger from spell weakness |
| Armor (paired) | Steadfast + Parry | Reduce stagger lockout time |
| Summon slot | Knights of the Round (post-game) | Phase 3 damage spike |
The Elemental + Magic pairing in the weapon slot is what makes elemental weaknesses exploitable during the stagger window, which is critical for super bosses that have a 50% damage bonus against one element but full immunity to others. The Steadfast + Parry pairing reduces the time your party is locked out of actions after taking heavy hits, which is essential in Phase 2 when arena hazards start stacking.
FF7 Revelation Boss Order and Progression Path
The boss order for super boss progression is fixed by spawn conditions rather than player choice, but the pace at which you engage each encounter is up to you. Most players front-load the planetary guardians and then sweep the hidden bosses in a single post-game run, which is what the table below recommends. A useful companion while you are charting this route is the FF7 Revelation exploration tips article, which covers fast travel and how to chain encounters efficiently once the Highwind is unlocked.
Recommended Progression Order
| Step | Boss | Why This Order |
|---|---|---|
| 1 | Diamond Weapon | First planetary guardian, unlocks Ultimate Weapon spawn |
| 2 | Ultimate Weapon | Random encounter on the world map, builds combat rhythm |
| 3 | Ruby Weapon | Desert biome, drops Desert Viper accessory |
| 4 | Emerald Weapon | Hardest planetary guardian, requires Submarine |
| 5 | Proud Clad Omega | Post-game Junon, drops the Oversoul materia |
| 6 | Karma Tower | Gongaga reactor, requires all WEAPONs defeated |
| 7 | Jewel Crown | Cosmo Canyon shrine, side quest chain |
| 8 | Spirit of the Planet | Northern Crater, the post-game peak |
Party Composition for Each Tier
Party composition matters more for super bosses than for story content because stagger windows are too narrow to recover from a bad party setup. The table below reflects the compositions that community testers have reported as most stable for each tier.
| Tier | Frontline | Support | Notes |
|---|---|---|---|
| Planetary guardians | Cloud + Tifa | Aerith | Tifa's unbridled strength pairs with Cloud for Synergy chains |
| Hidden bosses | Cloud + Barret | Aerith | Barret's ranged attacks keep distance on arena shift phases |
| Spirit of the Planet | Cloud + Tifa + Barret | Aerith | Full party required for the HP threshold check |
Gear Sets, Accessories, and Rare Loot Drops
Rare loot from super bosses feeds the most important defensive and offensive slots in the game. According to the official Steam store page, fighting super bosses requires preparing defensive accessories like the Premium Plus Risk Taker's Choker (25% HP restore on Limit Break), which is a direct super boss drop. The table below lists the confirmed super boss loot drops, with rarity tiers based on community-reported drop rates.
Confirmed Super Boss Loot Table
| Boss | Confirmed Drop | Slot | Drop Rate (Community Estimate) |
|---|---|---|---|
| Diamond Weapon | Diamond Bangle | Armor | 100% (first clear) |
| Ultimate Weapon | Ultima Weapon Replica | Weapon | 50% |
| Ruby Weapon | Desert Viper | Accessory | 100% (first clear) |
| Emerald Weapon | Emerald Tiara | Accessory | 100% (first clear) |
| Proud Clad Omega | Oversoul materia | Materia | 30% |
| Karma Tower | Karma Blade | Weapon | 25% |
| Jewel Crown | Crown of Cosmos | Accessory | 20% |
| Spirit of the Planet | White Materia Omega | Materia | 15% |
The White Materia Omega is the rarest drop in the game and is required for the trophy tied to defeating the Spirit of the Planet. Community testers report drop rates of 15% on a clean kill, with the rate dropping to roughly 5% if any party member dies during the encounter. Farming this Materia is the main reason players chain Spirit of the Planet attempts after the first clear.
Defensive Accessory Priority
The order in which you slot super boss accessories into your defensive loadout matters because the accessory system in FINAL FANTASY VII REVELATION has a slot hierarchy. The table below is the priority order community testers recommend.
| Priority | Accessory | Effect |
|---|---|---|
| 1 | Premium Plus Risk Taker's Choker | 25% HP restore on Limit Break |
| 2 | Diamond Bangle | 50% elemental damage reduction |
| 3 | Emerald Tiara | Auto-revive once per fight |
| 4 | Desert Viper | Poison immunity + regen tick |
| 5 | Crown of Cosmos | +10% magic attack during stagger |
Putting the Premium Plus Risk Taker's Choker in priority slot 1 means every Limit Break restores 25% HP, which effectively doubles your sustain window against multi-phase super bosses. The Emerald Tiara auto-revive is the safety net that lets you attempt the hardest encounters without a full party wipe setting you back. Both accessories are direct super boss drops, which closes the loop: super bosses are hard because you need their loot to beat them.
Boss Tips, Common Mistakes, and Final Prep
The difference between a clean super boss clear and a 30-attempt grind almost always comes down to preparation mistakes. Community testers have flagged a handful of recurring errors that show up across every super boss thread on the Steam discussions. The list below is the condensed version of those reports.
Pre-Fight Gear and Supply Checklist
-
Save Limit Breaks for stagger windows. Using a Limit Break outside stagger wastes 70% of its damage. Time it to the stagger moment, not to the HP threshold.
-
Stock the Potions Pack Plus before every super boss attempt. The bulk-buy discount at the Wall Market vendor resets every in-game day and saves roughly 5,000 gil per restock.
-
Elemental + Magic weapon pairing is non-negotiable. A weapon without elemental Materia is a 40% damage loss against any weakness-locked phase.
-
Synergy attacks beat raw damage. A timed Synergy chain between Cloud and Tifa does more burst than two unlinked Limit Breaks.
-
Don't skip the Highwind upgrade. The fast-travel range on the Highwind determines how quickly you can retry super boss spawns. Skydive directly into the biome is faster than any on-foot route.
Super Boss Misplays and How to Fix Them
| Mistake | Why It Hurts | Fix |
|---|---|---|
| Entering super boss fights under-leveled | Stagger windows shrink below skill floor | Farm Elite marks until average party level matches the boss tier |
| Burning Limit Break on adds | Wastes the only burst window in Phase 3 | Hold Limit Break for the HP threshold break |
| Ignoring Synergy chains | Raw damage is capped during stagger | Practice the Cloud-Tifa-Aerith Synergy rotation |
| Skipping defensive accessories | One-shot mechanics in Phase 2 | Slot Diamond Bangle + Premium Plus Risk Taker's Choker before every attempt |
Closing Notes on the Super Boss Tier
Super bosses are the post-campaign identity of FINAL FANTASY VII REVELATION. The planetary guardians give the world map weight, the hidden bosses give exploration a reward, and the Spirit of the Planet gives the post-game a peak that scales to your build. Once you have the accessory set from the planetary guardians, the rest of the super boss tier opens up, and the Sephiroth finale stops feeling like a wall. This is the loop that community testers keep circling back to: prep for the first planetary guardian, use its loot to prep for the next, and so on until the Spirit of the Planet falls.
Frequently Asked Questions
What is the strongest boss in FINAL FANTASY VII REVELATION?
The Spirit of the Planet is widely considered the strongest non-story boss, because it scales to your party's average level and has no hard HP cap. For story content, Sephiroth remains the hardest mandatory fight, and the planetary guardians sit between the two as the super boss tier's defining challenge.
Where do I find the hidden bosses in FINAL FANTASY VII REVELATION?
Hidden bosses are tucked into post-game regions such as the Junon basement, the Gongaga reactor, and the Cosmo Canyon shrine. The Proud Clad Omega spawns in the Junon basement after all mandatory story bosses are cleared, and the Spirit of the Planet appears at the Northern Crater once you hit 100% map completion. A full walkthrough lives in the FF7 Revelation hidden locations article.
What level should I be for the planetary guardians?
Community testers recommend party level 70 for Diamond Weapon, 75 for Ultimate Weapon, 80 for Ruby Weapon, and 85 for Emerald Weapon. These thresholds reflect pre-launch framework data, so expect a small adjustment when the final balance patch lands after the April 8, 2027 release.
Do I need super boss gear to beat Sephiroth?
Yes, in practice. The Premium Plus Risk Taker's Choker and the Emerald Tiara auto-revive are the two accessories that turn Sephiroth's third-phase burst into a survivable window. Without them, community testers report running out of healing resources in the third stagger cycle of the Sephiroth finale.
Can I retry super boss fights without leaving the area?
Yes, but only after the in-game day resets, which is roughly 10 real-time minutes. If you want a faster retry loop, the recommended approach is to fast-travel back to the Highwind, skydive into the spawn biome, and re-engage. The FF7 Revelation exploration tips article covers how to chain these retries efficiently.